So some of you may remember at the start of the year I put up a post with lots of different things I’d made.
You might remember these slippers:
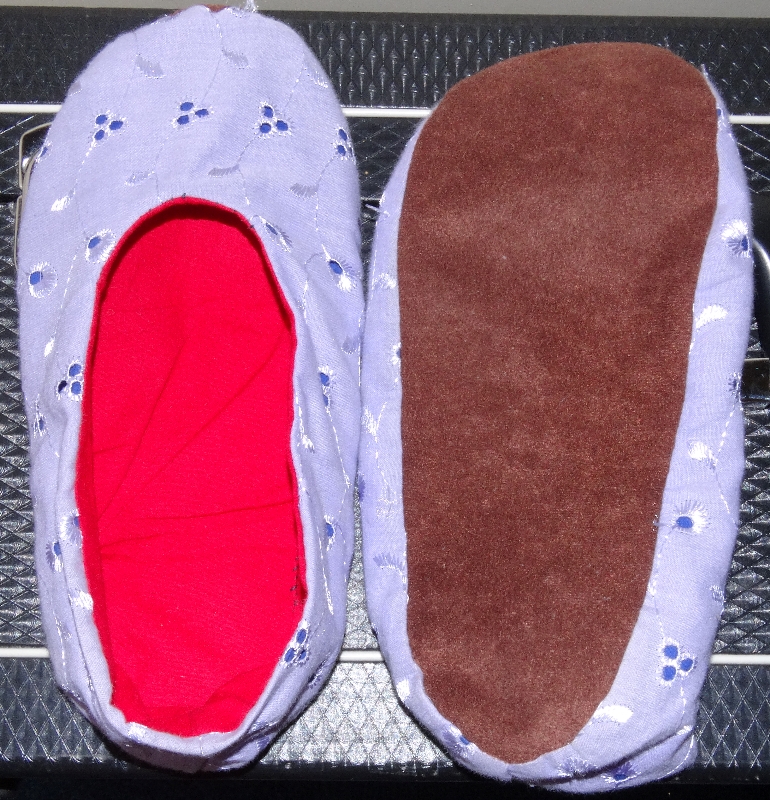
While they are lovely slippers, they have a few problems which can’t be solved without making a second pair. The main problem is that they fall off my feet. So I decided that I would make a second pair!
This time I also remembered to take photos at each stage so that I can show you guys what I did!
As the main problem was that I didn’t want them to fall off my feet I made them ever so slightly smaller, simply by using a larger seam allowance…I used 0.5cm for the last pair, this time I used 1.5cm and trimmed the seam allowance down afterwards to reduce the bulk at the seams. I also extended the toe covering part to come further up my foot which will also help to hold it on.
Step 1 – Cut out all the pieces
These slippers require only two pattern shapes – the sole and the upper. For each slipper I needed 3 sole pieces and 2 uppers. Before we go any further I’m going to describe my fabrics.
- Fabric A – Starry cotton, used for 1 upper (intended to be the topmost layer)
- Fabric B – Pink cotton, used for 1 upper and 1 sole (this is my lining fabric)
- Fabric C – Faux suede, used for 1 sole (the part that goes on the floor)
- Fabric D – Medium weight, iron-on interfacing, used for 1 sole (goes between C and B on the sole to provide strength and an extra layer).
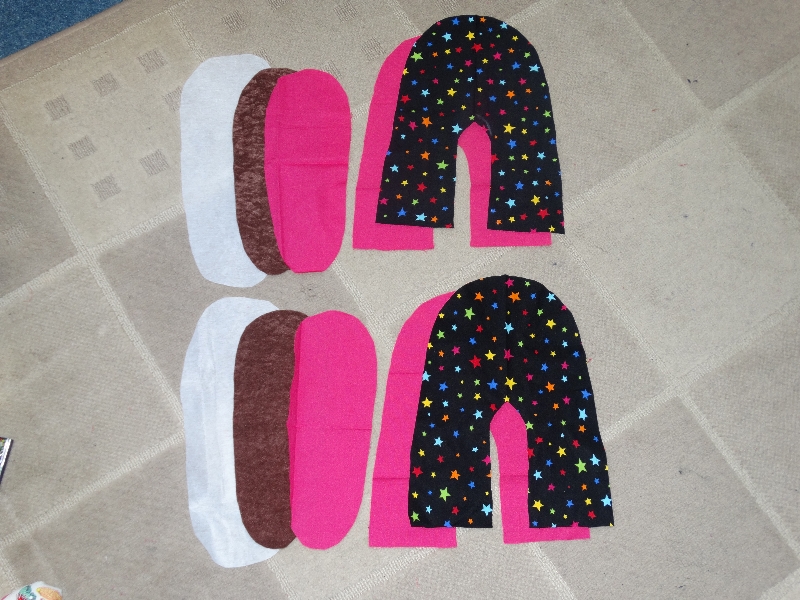
So with this information, I cut out all my pieces:
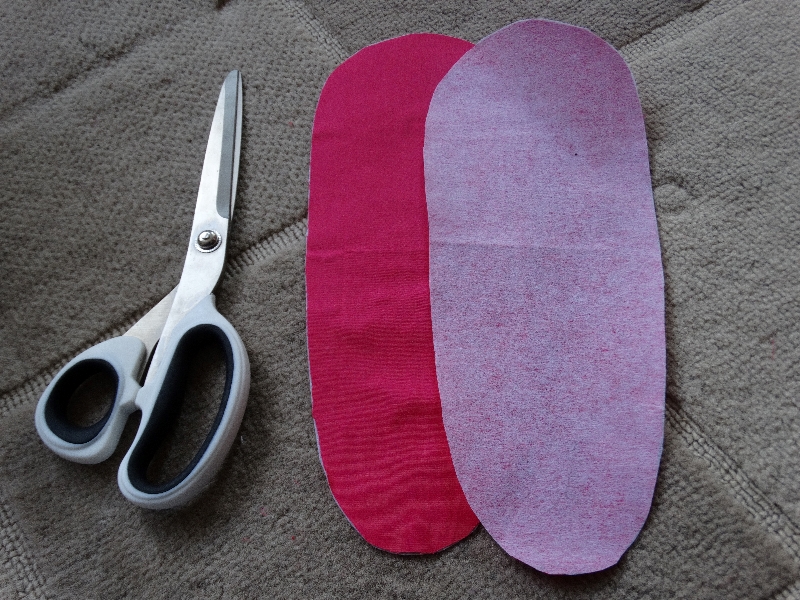
As you can see, 6 soles, 4 uppers. Fabric D for the sole is larger than the others because it will be trimmed to size once it has been ironed on in the next step!
Step 2 – Iron On The Interfacing To The Lining
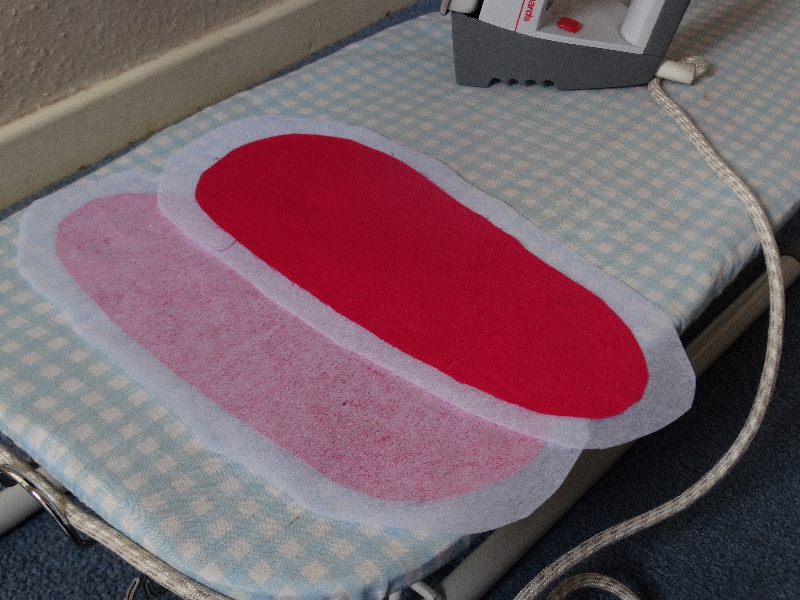
So using an iron, attach fabric D sole piece to fabric B sole piece. Easy right? It’s amazingly easy to put one of the fabrics the wrong way up and end up with glue on the iron…oooppps! Anyway, this is once I had success:
Step 3 – Trim The Interfacing To Size
Grab the scissors…snip snip snip…end up with something like this:
Wonderful. We’re getting somewhere!
Step 4 – Make The Lining and Outer
This is wear it gets complicated. Firstly, I’m just using the pink fabric at the moment. Got that? Just the pink fabric.
So I forgot to take a picture, but with each upper, the back seam got sewn up (remember remember Steph, 1.5cm seam allowance…not 0.5cm…I have this bad habit of using tiny seam allowances…and then wondering why my garment is too big!). Anyway, that’s the easy big.
The next bit, I had to pin the upper to the sole (right sides together), noting that the perimeter of the upper is larger than the perimeter of the sole. This is called easing and is often used to attach sleeves and things like that. I didn’t do as they tell you to for that, I just used LOTS of pins and had a few little tucks (unintentionally). They’re gonna be on my feet. If anyone’s looking that closely we have a problem! Here is all my pins:
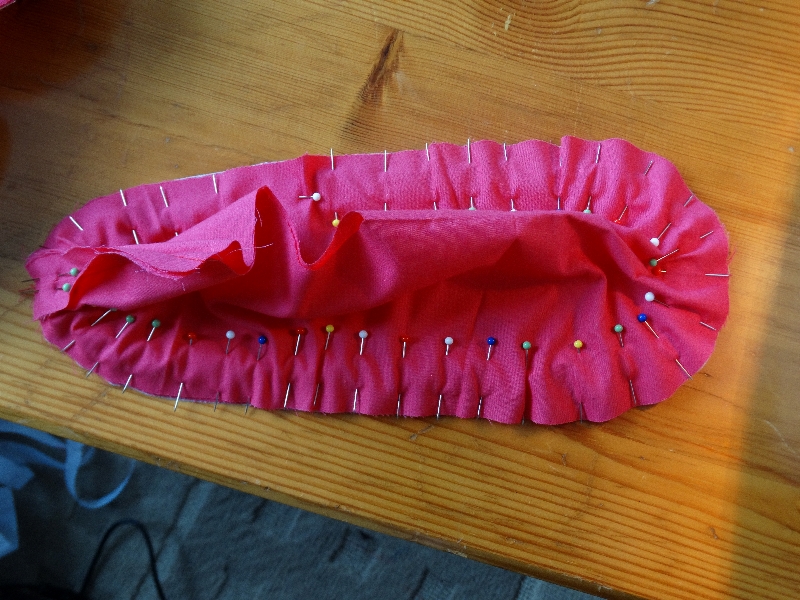 It looks a bit like a sea slug to me…just a very pink and spikey one!
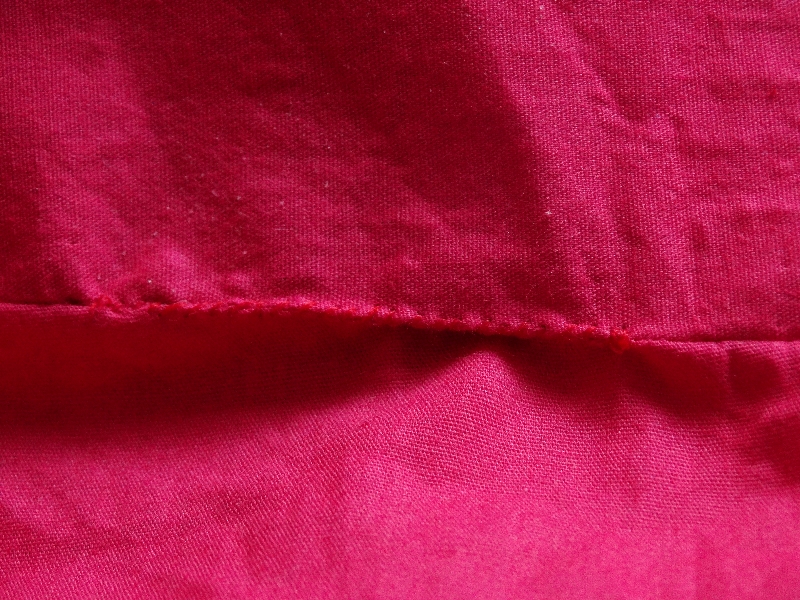
The next task – SEW IT. Remembering to leave a gap of about 4cm somewhere on the straight side to turn it right sides out later. I forgot to leave a gap first time. You can see where I unpicked it.
So do this with both linings and voila! Two linings.
Next, I repeated the same process with the outers – i.e. fabric A (the starry one) and fabric C (the suede)
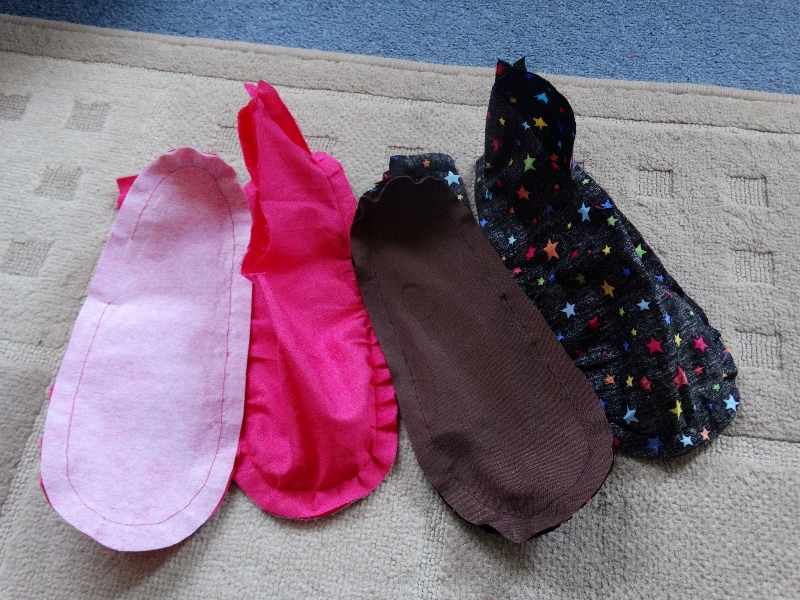
Then you have 4 sea slugs:
Step 5 – Reducing Seam Bulk and Curved Seams
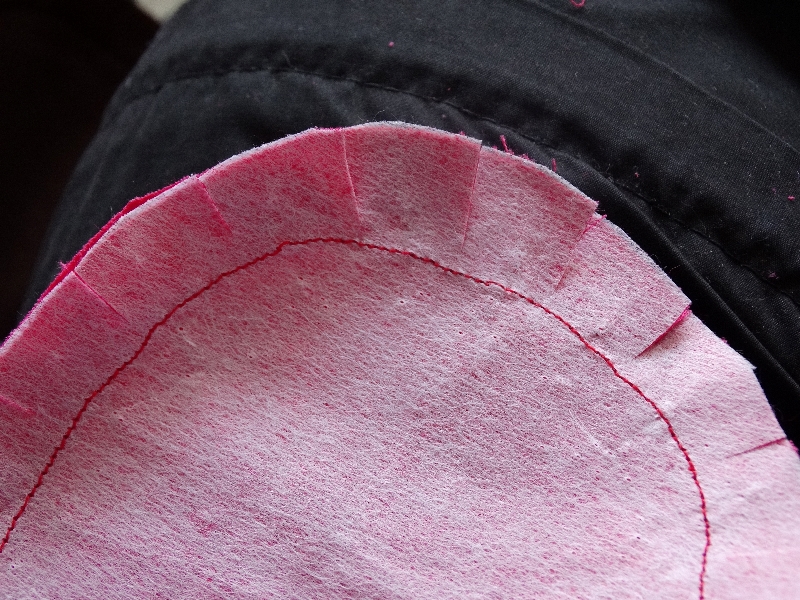
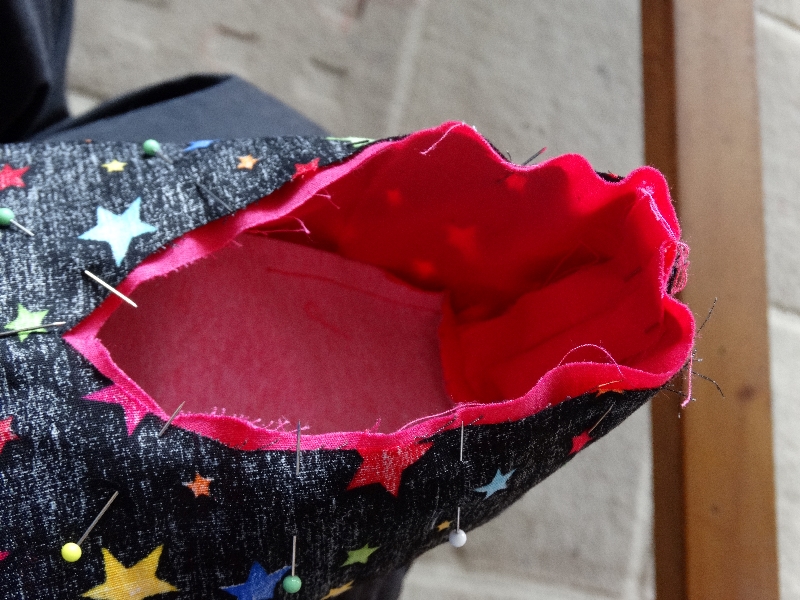
As previously mentioned I’m going to cut my seams down to 0.5cm. BUT, before I do that, I’m going to do a wonderful trick with curved seams that makes it sit better and makes it more comfortable. I cut slits into the seams around the curves, this means that the fabric can go where it wants. The slits go as close to the seam stitches as I could, without cutting the stitches though! A bit like this:
Then I cut the seams to 0.5cm and I turned the lining (the bright pink one) inside out (so that the right side is facing outwards now).
Step 6 – Attaching Outer To Liner
Oooo, this is a fun part!
Firstly make sure the right sides are facing and slip a lining inside an outer. Then I pinned around the top to join them together, just like this:
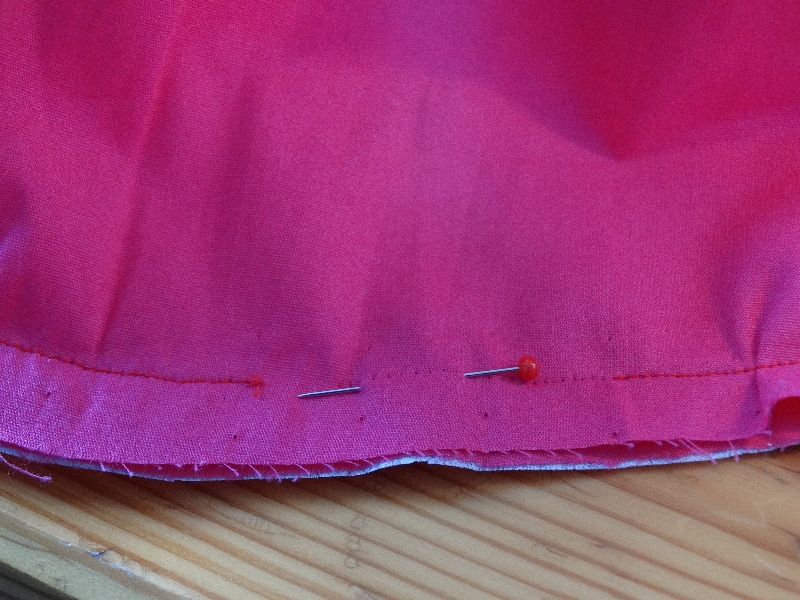
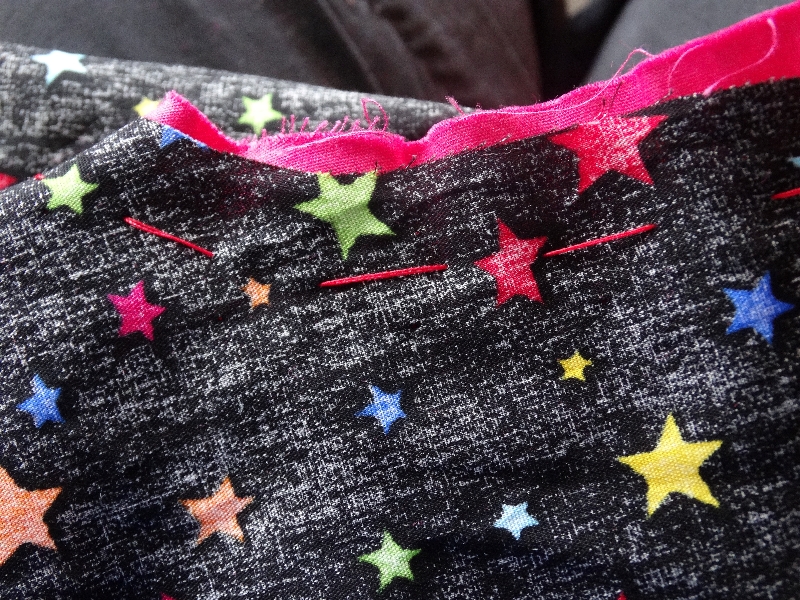
Its a bit of a pain to sew this, especially with pins in, so I got my little hand needle out and did some tacking stitches. I don’t normally use tacking stitches, but it was so useful for this. See my nice bright tacking stitches:
Then I put this under the machine and very very carefully sewed the lining to the outer (on each slipper).
Step 7 – Turning It Inside Out
Then I turned it inside out (outside in?) through the little 4cm hole I left earlier, and sewed the hole up with as small a stitch as I could. I still haven’t learnt how to slip stitch properly!
Step 8 – NEW SLIPPERS
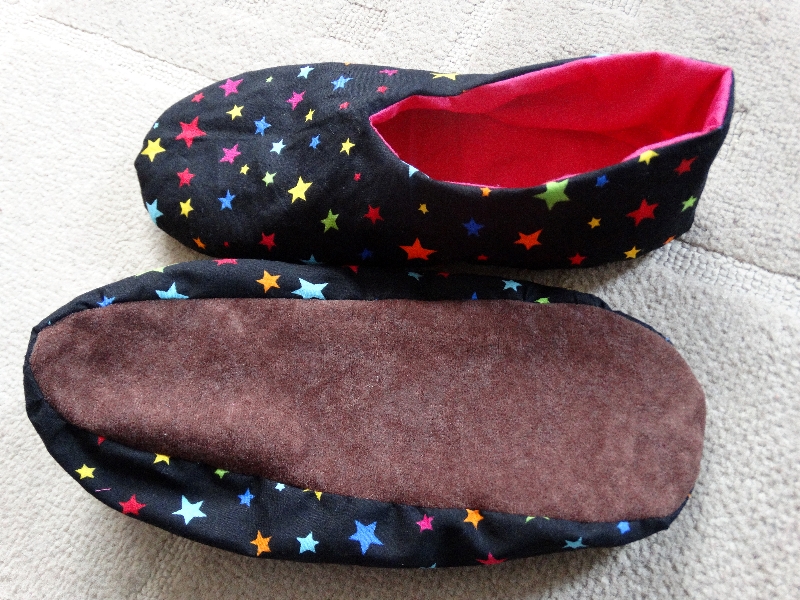
And ta-daaaaahhhh! I’m now the owner of a brand new pair of handmade slippers:
They are rather comfy, they stay on my feet, and they generally make me happy :D. I’m pleased with these slippers, I hope they will last me a while! If not, I can just whip up some more in a morning!

Oh no, I did not need to see this and now have yet another project I want to try! These are great!
LikeLiked by 1 person
I’m glad you like them! These only take a couple of hours, so you don’t need too much time to do them in…;-)
I have *so* many projects I want to try, its just a case of adding things to the list and working through it very very slowly!
~S.
LikeLike
So clever! This has got me thinking, I need a new pair of slippers too…
I really enjoy your blog and I’ve nominated you for the Real Neat Blog Award 🙂 For more about it take a peek here: https://scranshums.wordpress.com/2015/03/27/on-the-real-neat-blog-award/
LikeLike
They’re easy to make 🙂 You can hand sew them as well if you don’t have a sewing machine, it will obviously take a little longer 🙂
Awwww, thank you 🙂 ooooo, questions to answer!!! You might not get replies till monday now…but you’ll get answers! 🙂
LikeLike